Gmail SMTP secure connection error 5.7.0 – Client was not authenticated
Sometimes based on project requirements you need to send mail through code using an SMTP server. Such request works if the connection is secure and in case of failure, the server will respond with an authentication failed message. This article explains, how to solve Gmail SMTP server connection.
Gmail Authentication error message/ SMTP Exception
The following error occurs if authorization fails at Gmail SMTP server.
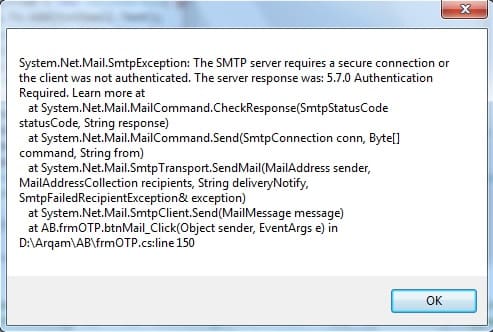
“The SMTP server requires a secure connection or the client was not authenticated. The server response was: 5.7.0 Authentication Required. Learn more at…”
Description: An unhandled exception occurred during the execution of the current web request. Please review the stack trace for more information about the error and where it originated in the code.
Exception Details: System.Net.Mail.SmtpException: The SMTP server requires a secure connection or the client was not authenticated. The server response was: 5.5.1 Authentication Required. Learn more at
Solution – Check All Settings
Try the following solutions in order to solve the error.
1. Incorrect Gmail Username and/or password
First, you need to make sure that the Username and Password you entered are correct. While Gmail lets you log in with the Username, when you’re sending emails using code, you have to use the full Email address as the Username.
2. SSL setting in code
Gmail makes sure emails are sent securely, so you must turn on SSL security when your application connects to a Gmail mailbox. In .Net, you can do this by setting the “EnableSsl” option of the SmtpClient to True i.e., EnableSsl = True.
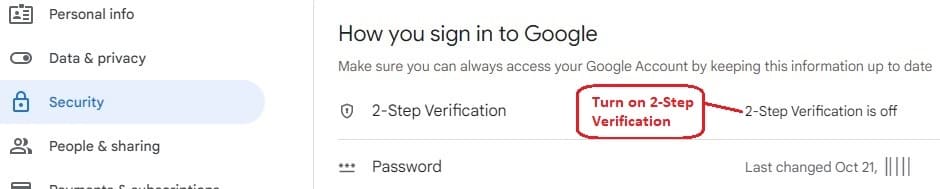
3. Enable “2-Step verification & set app passwords” – Gmail Security
If authorization fails with your regular password that means you need to use Google generated app password in your code and for this you need to enable 2-Step verification in your Gmail setting.
Follow the below steps to enable 2-Step verification and generate a new app password for your code:
a) Go to https://myaccount.google.com/security
or go to your Google account >> Security and Click on 2-Step Verification.
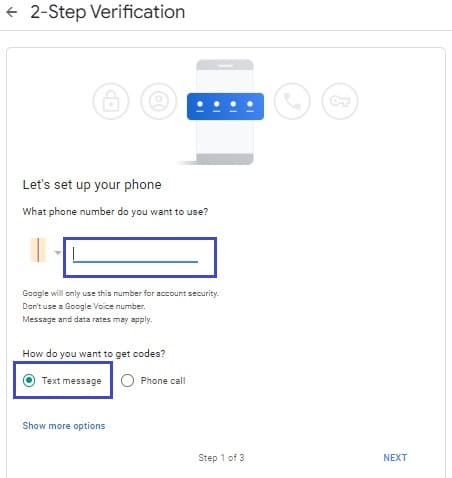
b) It will start 2-Step Verification process.
Enter your valid phone number & select any one option (text message or phone call) to receive the verification code and Click on Next.
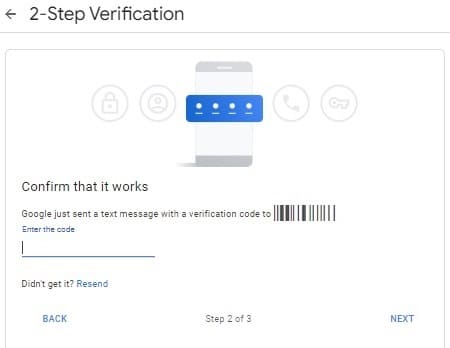
c) Enter the verification code which you received via text or call and click on ‘Next‘
d) Click on ‘TURN ON‘ and complete the 2-Step Verification process.
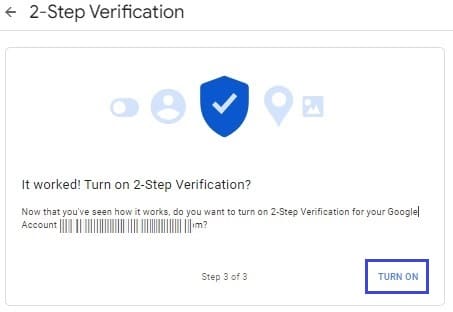
e) 2-Step Verification is enabled.
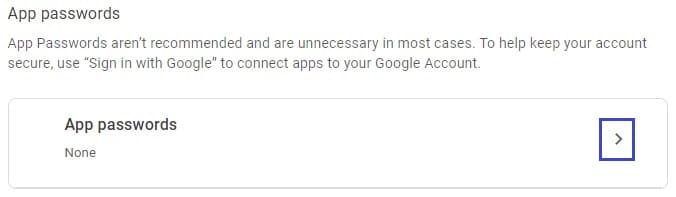
Now again, Go to Security >> 2-Step Verification
Scroll down and go to App passwords
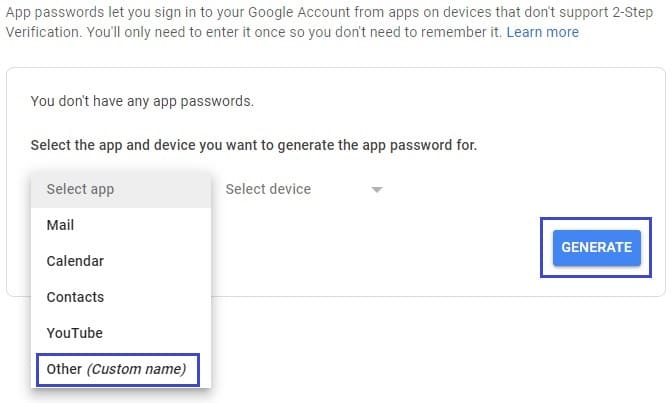
f) Select ‘Other (Custom name)‘ option in App DropDownList
Give a reasonable app name and click on the ‘Generate‘ button.
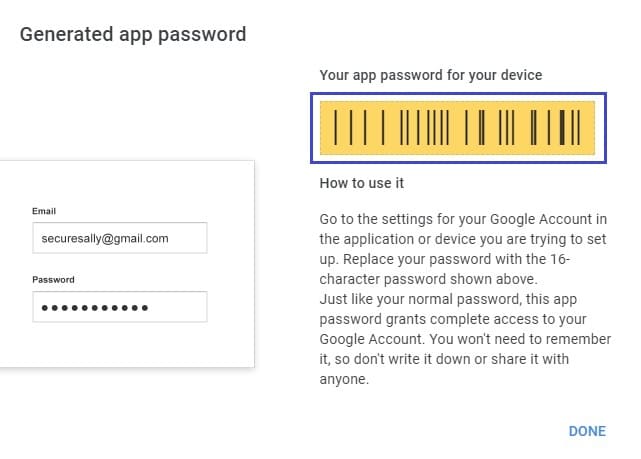
g) Once a new app password is generated, copy and save the Password (in Yellow Box) somewhere because this password will be visible only one time
Once the password is copied & saved click on the Done.
h) You can see app password list.
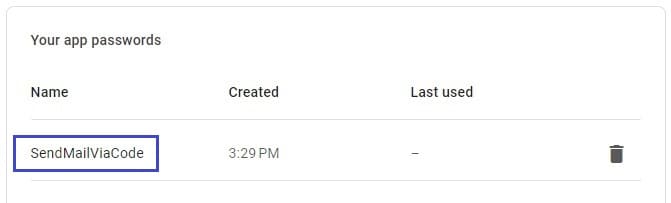
In the same way, you can generate & add more passwords for different applications or devices. In case you forget or lost your password then you can delete it and generate a new one.